Monday, December 1, 2008

Eggplant Steaks Parmigiana Alla Ringo


I've tried once before making Eggplant of some sort, but, clearly, it wasn't very exciting or tasty if I can't even remember how I cooked it. As I already mentioned before, Henry and I bought a new cookbook, and my sous chef helped me make our third meal from this new cookbook.

Our sweet friend Kristen came over to bring us our Christmas present (THANKS!), so she joined us for dinner. I'm glad I was already planning on making a pretty cool meal!

So this meal was really not hard, especially if you've made Chicken Fried Steak before. Haha! I know that sounds bizarre, but that's really the hardest part is the prep work in the breading station. In the end, the cool thing about this dinner is that you'll end up with a stacked main dish. You end up with Eggplant topped with tomato pesto sauce topped with another eggplant topped with more tomato pesto sauce finished off with melted provolone cheese. It's absolutely delicious!
Have a look at the recipe here.

Friday, November 28, 2008

Red Velvet Cake

For as long as I have been cooking, I've always wanted to make a red velvet cake that was actually good! I tried once before...a loooong time ago...but I remember not having enough red dye to make the cake RED velvet.

Well, several weeks ago, I was browsing the food net work site and found a great Red Velvet Cake recipe that I thought would be great to try. I figured if it was on their website, it had to be delicious!Red Velvet Cake As I started making this cake, I had to get my taste tester/helper to run to the store for a few more ingredients :) Thanks hubby! I knew I had not used my little tube of red food coloring that comes in the pack with the four colors, but I also knew that the tube wouldn't be enough for the 2 tablespoons plus 2 teaspoons that the recipe requires. I mean, that's a lot of red dye! Smart guy that he is, he found the bottle of red food coloring that Adam's makes which is large for red food coloring. The big bottle did the trick, and you can see that the batter is REALLY RED! My favorite color :)Red Velvet Cake 2 There was so much batter than what I expected, so the extra batter was made into cupcakes. These were the first out of the even. They look so pretty and RED!Red Velvet Cake 3 Finally I got to frost the cupcakes. I love the way the way finishes off the red! If only I had say..a black dot to put on top?!Red Velvet Cake 4 Red Velvet Cake 5 The cake finally came out of the oven and got a thick bit of frosting as well! We haven't cut into that yet, but I'm sure it's the same as the cupcakes.Red Velvet Cake 6  Oh wow! The inside looks so moist and delicious. I'm curious if it tastes good?Fall 2008 61 I guess so!

Ingredients

For the cupcakes/cake:
15 1/2 ounces all-purpose flour
1 1/4 teaspoons baking soda
1 1/4 teaspoons salt
1 1/4 teaspoons unsweetened cocoa powder
1 1/2 cups vegetable oil
13 ounces granulated sugar
1 1/4 cups buttermilk
3 eggs
2 tablespoons plus 2 teaspoons red food coloring
1 1/4 teaspoons vinegar (white or apple cider can both work)
1 1/4 teaspoons vanilla extract
1/8 cup water
For the cream cheese frosting:
1 1/2 pounds cream cheese, room temperature
1 pound butter, room temperature
2 pounds powdered sugar, sifted
1 tablespoon vanilla extract
Directions
For the cupcakes/cake:
Preheat oven 350 degrees F.
Sift together flour, baking soda, salt, and cocoa powder into a bowl and set aside.
In a mixer fitted with paddle attachment, mix oil, sugar, and buttermilk until combined. Add eggs, food coloring, vinegar, vanilla and water and mix well. Add the dry ingredients a little bit at a time and mix on low, scraping down sides occasionally, and mix until just combined. Be sure not to over mix, or the batter will come out tough.
Line a 16-cup cupcake pan with paper liners, or prepare cake pan with baking spray, scoop the batter into the liners/pan and bake at 350 degrees F for 20 to 30 minutes or until the toothpick comes out clean. Let cool.

For the cream cheese frosting:

Whip the butter and cream cheese together in a mixer fitted with a paddle attachment until creamed. Gradually add powdered sugar to the mixture and scrape down the bowl as needed. Add the vanilla and mix until combined.
The frosting can be used right away, or stored in the refrigerator up to a week.
Frost cooled cupcakes/cake with the cream cheese frosting.

Tuesday, November 25, 2008

Sausage and Rigatoni Fake-Bake

Yet another recipe from our new Big Orange Book! I didn't get a picture of this one, but it looks really great. We actually went to Maggiano's Little Italy the night after I made this, and we ordered the exact same thing pretty much. My taste tester says he likes the version I made best. What a great tester!

Sausage and Rigatoni Fake-Bake

Salt
1/4 lb. rigatoni or whole grain rigatoni
1 tablespoon EVOO
1 link of sweet Italian sausage
1 link of hot Italian sausage
1 large garlic clove, finely chopped or grated
1 (8-ounce) can tomato sauce
A handful of fresh basil leaves, torn
2 tablespoons heavy cream
1/4 cup freshly grated Parmigiano-Reggiano

Bring a pot of water to a boil for the pasta. Salt the water, add the rigatoni, and cook to al dente. Preheat the broiler.

Heat the EVOO in a small or medium ovenproof skillet. Remove the sausage from its casing and add to the skillet, breaking it up with a spoon as it browns, 5 minutes. Add the garlic, cook for a minute or two more, then stir in the tomato sauce and cook just to heat through. Fold the basil into the sauce and stir in the cream. Simmer the sauce over low heat for 5 minutes. Add the drained pasta to the skillet and toss to coat with the sauce. Sprinkle the pasta with the cheese and place under the broiler until browned, 3 to 4 minutes.


I used our iron skillet to make this in, and I actually doubled the recipe. This recipe is created for one person, although it can feed two people as is. When doubling the recipe, it allows you to have leftovers for both people. This is a quick and easy recipe, and it tastes absolutely great! This makes great "guy food." :)

Red and Green Winter Stoup

I'm not really one for soups or stews, but, for some reason, when I saw this recipe, I just had to make it!

I was getting pretty tired of looking through the recipes in the cookbooks I have, so I was begging Henry for a new cookbook. We were going to get the Biggest Loser cookbook, but there just were not enough recipes in that book. It was a pretty cool book though.

Nonetheless, we ended up getting Rachael Ray's Big Orange Book.

I just love that it is chunked FULL of recipes that, for the most part, look really good! We went straight to the store and bought food for the first few recipes, and this stoup was the first thing that I made. This is really good! I did half the recipe though, and there was enough for leftovers the next day for lunch.

You can find the recipe here: http://www.rachaelraymag.com/recipes/30-minute-meals/red-and-green-winter-stoup-recipe/article.html

A few notes on the recipe that I can help with follow. Now, I'm sure homemade roasted red peppers would be better for this recipe, but I just buy the jar of roasted red peppers. You can eyeball about how much would equal what you need. Also, we ended up using Parmesan cheese on the bread because we couldn't find the Asiago in the grocery store that day. I know they have it somewhere; perhaps they were out.
Hurry up! Head to the store and get the ingredients. You will love this stoup :)

Italian Sausage Ravioli with Roasted Red Pepper Cream

Italian Sausage Ravioli? Where do you buy that? Well, to my knowledge, you don't. Thus, I made this ravioli! That's right! I made homemade pasta! It was really fun and an interesting experience. This pasta recipe is from my Pasta cookbook that my parents bought me back in high school; Betty Crocker's A Passion for Pasta.

Fresh Pasta

Prep Time: 30 minutes Roll/Cut: 40 minutes
8 servings

5 large eggs
1 teaspoon olive or vegetable oil
1/4 teaspoon salt
3 cups all-purpose flour

I'm including the Food Processor Mixing directions, although I used my Stand mixer to make this.
Food Processor Mixing:
Place eggs, oil and salt in food processor. Cover and process until smooth. Add flour. Cover and process about 10 seconds or until dough leaves side of bowl and can be pressed together with fingers. (If dough is too dry, add a few drops of water; cover and process 5 seconds. If dough is too sticky, add a small amount of flour; cover and process 5 seconds.) Remove dough and press into a ball. Cover with plastic wrap or aluminum foil. Let stand 10 minutes.

Now for the recipe for the ravioli! This really is an easy recipe, so don't be intimidated. Technically, this recipe calls for Chorizo, but I wasn't able to find it in the grocery store after searching FOREVER! Thus, I chose the alternate for this recipe, which is Italian sausage. IT was great!

Chorizo Ravioli with Roasted Red Pepper Cream
Prep: 50 minutes Cook: 10 minutes
6 servings

1/2 recipe Fresh Pasta (above)
1/2 lb. bulk chorizo or Italian Sausage
1/3 cup grated Parmesan cheese
1 egg, slightly beaten
1 jar (7 ounces) roasted red bell peppers, undrained
1 small onion, coarsely chopped (1/4 cup)
1 cup whipping (heavy) cream
1 tablespoon chopped fresh or 1 teaspoon dried basil leaves
1/4 teaspoon coarsely ground pepper
1/4 cup shredded Parmesan cheese
1/2 cup chopped walnuts

Prepare dough for Fresh Pasta. Divide into 5 equal pieces; roll each piece as directed on page 261 into 14x14 inch rectangle. Cover rectangles with plastic wrap until ready to use.

Cook sausage in 8-inch skillet over medium-high heat, stirring occasionally, until no longer pink; drain. Cool 5 minutes. Stir in 1/3 cup grated cheese and the egg, breaking up sausage with spoon.
Spoon sausage mixture by teaspoonfuls into mounds about 1 1/2 inches apart in 2 rows of 6 mounds on one of the rectangles. Moisten dough lightly around mounds with water; top with second rectangle. Press gently around mounds to seal.

Cut between mounds into 12 squares, using pastry cutter or knife. Place on lighltly floured towel; sprinkle lightly with flour. Repeat with remaining sausage mixture and rectangles. (For fifth rectangle, cut crosswise in half. Place 6 mounds of sausage mixture on one half of the rectangle. Moisten dough lightly around mounds with water; top with second half of the rectangle. Press gently around mounds to seal. Continue as directed.) Cover ravioli with plastic wrap until ready to cook.

Heat bell peppers and onion to boiling in 1-quart saucepan; reduce heat to low. Simmer uncoverd about 5 minutes or until mixture is soft. Carefully pour into blender. Cover and blend on medium speed until smooth. Pour back into saucepan. Stir in whipping cream, basil and pepper. Heat over low heat, stirring occasionally, just until hot; remove from heat and keep warm.

Heat 4 quarts water to boiling in Dutch oven. Add ravioli. Boil uncovered about 6 minutes, stirring occasionally, until firm but tender. Drain ravioli. Spoon sauce over ravioli. Sprinkle with 1/4 cup shredded cheese and the walnuts.

Now, I didn't use a blender to make the sauce because I don't like losing so much as the bottom of the blender. Instead, I used the magic bullet. It's much easier to use for sauces like this. Additionally, because I don't really like them, I left out the walnuts. Otherwise, this is basically what I did to create this recipe! It was extremely yummy!

Tuesday, October 21, 2008

In-a-pinch Black Bean Chili

Over the summer, I decided to order a slow-cooker cookbook after a Barnes and Noble visit where I looked through such a cookbook. I found one that seemed perfect for what I was looking for.

I made a recipe or two from the cookbook over the summer, and recently I pulled it out again to find something I could leave at home all day to cook while Henry and I were at work. We decided that "In-A-Pinch Black Bean Chili" was what we were craving. It was the perfect size for 2 people with just enough for left overs for both of us. This chili does not have any meat, so, if you are vegetarian, this might be something you like. However, it does have chicken broth, but you can substitute vegetable broth.

Cooker: 3 quart
Setting and Cook Time: HIGH for 2 1/2 to 3 hours
(I had it on low for 8 hours)

2 tablespoons olive oil
1 medium-size onion, chopped
1/2 teaspoon ground cumin
1/4 teaspoon chili powder or 1 teaspoon chipotle chile paste
Two 15-ounce cans black beans, undrained
1/2 cup chicken broth or vegetable broth, canned or homemade
1 1/2 cups medium or hot chunky salsa
Pinch of crumbled dried marjoram
Juice and grated zest of 1 lime
Plain yogurt or sour cream (optional) for serving
Chopped cilantro for serving
Saltine crackers or flour tortillas (optional) for serving

Directions:
In a small saute pan, heat the oil over medium heat and cook the onion until limp. Add the cumin and chili powder, and stir to heat.

Pour beans and their liquid, chicken broth, salsa, and the spicy cooked onions into the slow cooker. Cover and cook on HIGH for 2 1/2 to 3 hours.

At the end of the cooking time, stir in the marjoram, lime juice, and lime zest. Serve the chili in bowls, topped with a spoonful of yogurt, if desired, lots of cilantro, and some crackers or warm tortillas, if desired.


We used sour cream and thought it was great! I know the lime sounds weird, but the lime really adds an amazing taste. Also, I used Jardine's Medium Texasalsa for our salsa. It really added some great flavor. Hit the grocery store this weekend and make this one day this week while you are work. You will love it!

I can make steak!!!

I've been so frustrated in the last 5 or 6 years with making steaks; I just can never get that awesome tender juicy steak to come out when I make them. I seem to be really talented at making a chewy "I need some A1 sauce" steak.


That is, until now :) FINALLY I've made a steak that doesn't need ANY sauce to make it go down. Thanks to many Food Network shows and the great advice from friends Rachel and Patrick, I can now make a steak worth sharing. Oh, I suppose it's also thanks to HEB for running Ribeyes on special. That always helps!


I've finally learned that searing our steaks for just 2 or 3 minutes on each side, then placing the steaks on a baking sheet in the oven for 5 or 6 more minutes prepares the perfect steak. This timing prepares a Medium to Medium Well steak. If you want it to be Well or "Burnt and Scraped" like my mom prefers (Love you Mom!), then just sear it longer on each side and cook it longer in the oven. Below is a picture, but it's not my same presentational pictures. I was just so excited about the steak, I wasn't as concerned with the prettiness of the presentation.

Note: This type of preparation is ideal if you don't have an outdoor grill. Obviously, if we had a grill, I'd have Henry cooking the steaks on that rather than my sissy indoor grill. Haha!

Weight Watchers Chicken Fried Rice

When I was living with my ever-so-health-conscious roomates in college, I discovered the healthier ways of eating. Thanks Jordan, Cynthia, Anne, and Carissa! :) Miss you all!!!

Well, I believe Carissa (or was it Cynthia?) had a wonderful Weight Watchers cookbook. I found a great chicken fried rice recipe in there, and I've made it several times in the past few years. Henry has really enjoyed it, so he decided to help me out...A LOT... this time.

If you are having a craving for Chinese but don't want that bloated "I ate a lot of salt" feeling, then you should really make this recipe! It's a wonderful way to satisfy the Chinese food craving.
Per http://www.weightwatchers.com/

Ingredients:
2 spray(s) cooking spray
4 large egg white(s)
1/2 cup(s) scallion(s), chopped, green and white parts
2 medium garlic clove(s), minced
12 oz uncooked boneless, skinless chicken breast, cut into 1/2-inch cubes
1/2 cup(s) carrot(s), diced
2 cup(s) cooked brown rice, regular or instant, kept hot
1/2 cup(s) frozen green peas, thawed
3 tbsp low-sodium soy sauce

Directions:

Coat a large nonstick skillet with cooking spray and set pan over medium-high heat. Add egg whites and cook, until scrambled, stirring frequently, about 3 to 5 minutes; remove from pan and set aside.

Offheat, recoat skillet with cooking spray and place back over medium-high heat. Add scallions and garlic; sauté 2 minutes. Add chicken and carrots; sauté until chicken is golden brown and cooked through, about 5 minutes.

Stir in reserved cooked egg whites, cooked brown rice, peas and soy sauce; cook until heated through, stirring once or twice, about 1 minute. Yields about 1 cup per serving.

Weight Watchers POINTS® Value: 3
Servings: 6
Preparation Time: 15 min
Cooking Time: 13 min

Milk Chocolate Oatmeal Cookies

Wow, could I take any longer, right? Well, I have some catching up to do, but, first, I have made these cookies that are just perfect to make you feel at home. These are the perfect chocolate chip cookies that aren't the every day run of the mill chocolate chip cookies.

The first time Henry and I made them, we didn't do so hot. Unfortunately, they weren't something we were keeping around the apartment; no no, we made them for our friends David and Christine. I was so incredibly embarrassed to take those cookies to them. However, we made them again, and they turned out nice and yummy!!!

Back in the day, my Dad brought a Nestle cookbook home to me, and this recipe is from that cookbook. Thanks Dad! Here ya go, and go make these now :) They are delicious!

Ingredients:
1 1/4 cups all-purpose flour
1/2 teaspoon baking powder
1/2 teaspoon baking soda
1/2 teaspoon ground cinnamon
1/4 teaspoon salt
3/4 cup (1 1/2 sticks) butter or margarine, softened
3/4 cup packed brown sugar
1/3 cup granulated sugar
1 1/2 teaspoons vanilla extract
1 large egg
2 tablespoons milk
1 3/4 cups (11.5-oz. pkg.) NESTLÉ® TOLL HOUSE® Milk Chocolate Morsels
1 cup uncooked quick or old-fashioned oats
1/2 cup raisins (optional) (Henry and I did not use these)

Directions:PREHEAT oven to 375° F.

COMBINE flour, baking powder, baking soda, cinnamon and salt in small bowl. Beat butter, brown sugar, granulated sugar and vanilla extract in large mixer bowl until creamy. Beat in egg. Gradually beat in flour mixture and milk. Stir in morsels, oats and raisins. Drop by rounded tablespoon onto ungreased baking sheets.

BAKE for 10 to 14 minutes or until edges are crisp but centers are still soft. Cool on baking sheets for 2 minutes; remove to wire racks to cool completely.

Wednesday, August 20, 2008

Mmmmm Cake!

Another thing to share in order to catch up! A co worker at work had a birthday, so I decided to make a cake. Everyone was pretty excited seeing as how a) they got cake and b) it was the first time since they all started working together that someone actually recognized that people had birthdays!

I decided to forgo my normal box cake mix when making SPECIAL cakes, so I used a recipe from my KitchenAid directions/cookbook. This was also my first attempt outside the world of fondant.
KitchenAid Easy White Cake
2 cups all-purpose flour
1 1/2 cups sugar
3 teaspoons baking powder
1/2 teaspoon salt
1/2 cup shortening
1 cup low-fat milk (I used skim and it was fine)
1 teaspoon vanilla
4 egg whites
Combine dry ingredients in mixer bowl. Add shortening, milk, and vanilla. Attach bowl and flat beater to mixer. Turn to speed 2 (low) and mix about one minute. Stop and scrape bowl. Add egg whites. Turn to speed 6 and beat about 1 minute or until smooth and fluffy.
Pour batter into two greased and floured 8 or 9 inch round baking pans (uh, I used square; big surprise). Bake at 350 degrees F for 30 to 35 minutes or until toothpick inserted in center comes out clean. Cool 10 minutes. Remove from pans. Cool completely on wire rack. Frost if desired.

IF DESIRED?! Well of course you must have MORE SUGAR in the form of frosting or icing :)I used Wilton's Buttercream Icing, but I think I used too much milk.


TaDa! My first attempt at a buttercream cake :)

Well, my next attempt is more cheesecake :)

Tuesday, August 19, 2008

Buffalo Chicken Pizza and Devilish Chicken and Cool Green Beans

Change on 9/12/10- Gluten Free notes for the chicken dish at the bottom of this post.

Ok, so I know it's been a REALLY long time since I posted, but I have been cooking. So I have a back log of yummy recipes to show. Woohoo!

First up is another pizza. Well...when you're married to a pizza lover and a buffalo chicken lover, why not make a Buffalo Chicken Pizza? I didn't really have a recipe for this; I just kind of made it up. I did pretty much the same thing for the dough as my last pizza, and the sauce was pretty similar, too. I put both Blue Cheese crumbles as well as a shredded cheddar and mozzarella blend on top. For the buffalo chicken, I created a sauce from Tobasco sauce believe it or not. It was kind of surprising to me. I finished it off with sliced green onions, and here is the result!
And my taster enjoyed, but he got a little tongue burn from being too excited to eat it!


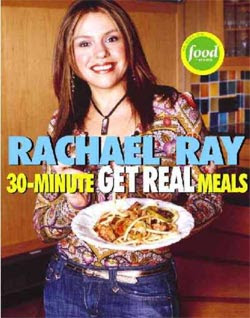
Next up is a recipe that I've made before. Henry's parents and littlest sister came into town one weekend, and I made this Devilish Chicken and Cool Green Beans from my Rachael Ray 30-minute Get Real Meals cookbook, so I decided to make it again since we liked it so much. It's rare for me to make things twice, so you have to know this is good for me to make it again.

Mmmmm....as it simmers!
OH boy! The green beans are a steamin'. I added these little guys as a compliment to dinner, and my compliments go to Mr. Pillsbury. Haha! I just really wanted to use my small bar pan from Pampered Chef. Thanks Ronnie, Teresa, Ash, and Chase!As it was plated, Henry was drooling I'm pretty sure...
Ok, so that's all for now, but I do have more to show you :) They will be more of the sugary kind, so be prepared! For all who thought, "Oh she's not cooking since she got a job," oh no no. I'm still at it, just not posting as often. More to come though!

New: It's December 2nd, and my sweet friend Courtney has just made me realize that I have not included the recipe for this Devilish Chicken. So sorry all! Please enjoy this recipe, as it's most definitely a reasonable yummy one! From Rachel Ray's 30 Minute Get Real Meals...
Devilish Chicken and Cool Green Beans
Yields 4 Servings

Ingredients

3 tablespoons EVOO
2 teaspoons paprika
1 teaspoon dry mustard or 1 tablespoon spicy mustard
Salt and freshly ground pepper
4 boneless skinless chicken breasts, 6 to 8 ounces each
1 medium onion, thinly sliced
4 garlic cloves, chopped
1 red bell pepper, cored, seeded, quartered lengthwise, and sliced into thin strips
1 tablespoon tomato paste
1 teaspoon crushed hot red pepper flakes
1 1/2 cups chicken stock or broth
1 to 1 1/2 lbs green beans, stem end trimmed
10 fresh mint leaves, chopped
A handful of fresh flat-leaf parsley, chopped
2 tablespoons cold butter

Directions

In a large skillet, heat 2 tablespoons of EVOO (twice around the pan) over medium-high heat. Mix the paprika and mustard with some salt and pepper and season chicken breasts on both sides. Add the seasoned chicken to the skillet and brown on the first side for three minutes, flip, and then sear the second side, 2 minutes. Remove the chicken and reserve on a plate under a foil tent. To the pan, add the onion, garlic, bell pepper, tomato paste, and red pepper flakes. Cook the vegetables for 5 minutes, stirring frequently. Add 1 cup of the chicken stock to the vegetables and bring it to a simmer. Add the reserved chicken back to the pan and cook for 10 minutes more, turning the chicken over every now and then.

While the chicken is cooking, prepare the cool green beans. Heat a medium skillet with the remaining tablespoon of EVOO, then add the green beans, season with salt and pepper, and cook for 1 minute. Add the remaining 1/2 cup of chicken stock and continue to cook for 3 to 4 minutes, or until the green beans are tender. Add the mint and half of the parsley.
Remove the chicken from the skillet to a platter. To finish the sauce, turn the heat off and add the remaining parsley and butter, stirring to melt the butter. Pour the sauce over the chicken. Serve both the chicken and green beans immediately.

Make it Gluten-Free!
-Ensure that your chicken stock is gluten free.  Some brands are gluten free while others are not.

Friday, July 11, 2008

Homemade Blueberry Muffins

It was morning that needed breakfast today :) I decided that I needed to try my hand at homemade blueberry muffins because I've always just made them from a box. So, I searched online (big surprise) and found this recipe. http://recipes.recipeland.com/recipes/recipe/show/Blueberry_Cupcakes_or_Muffins_4300


I decided to half it since we really don't need that many muffins. What I loved about this recipe is that, even before you bake it, you can tell the batter is not as oily as boxed recipes. Both are still very good, but my tastetester claims that these are better ;)

Going into the oven!


Done and sugared :) Time to eat!

Thursday, July 10, 2008

Chocolate Chip Cookies with a Twist

Time for baking! Tuesday night, I was ready for some sweet after all that saltiness on the pizza. I searched through the FoodNetwork.com site and found the following recipe. http://www.foodnetwork.com/food/recipes/recipe/0,,FOOD_9936_27590,00.html

I wanted chocolate chip cookies, but I didn't want the same old recipe. So that's why I chose this recipe! These cookies stay chewier than normal chocolate chip cookies, and we really liked them!


Tuesday, July 8, 2008

Homemade Pizza

Henry has never, in over 4 years together, had my homemade pizza. So, I finally decided to make it for him. Now, I don't make pizza the same way every time, but here is how I made it today.

First, for the dough, I used this recipe from the Kitchen Aid Mixer book that the mixer comes with. I really ventured out, I know. Below is someone who has posted the recipe online. It's also good to use corn meal on the pizza pan before putting the crust on it.
Crusty Pizza Dough http://www.recipezaar.com/64860

Then I made the sauce using a tomato sauce recipe from my Fannie Farmer cook book. The recipe has been posted by someone here.
Tomato Sauce http://recipes.epicurean.com/recipe/2526/tomato-sauce.html

Finally, I had some spinach on hand that I cooked up in a small skillet with about 2 tablespoons of olive oil. I used my rolling pin to spread out the pizza dough and placed it on my Pampered Chef large stone. I covered it in olive oil and spread cornmeal over the oil. After placing the dough on the stone, I covered the dough with the tomato sauce I cooked.

Also, I took a small glass bowl and poured about 2 tablespoons of olive oil into it. I added the following by eyeing it, but I'm guessing at the amounts that I placed into the glass bowl; Tarragon leaves (1/8 teaspoon), Garlic Powder (1/4 teaspoon), Oregano (1/4 teaspoon), and Paprika (1/8 teaspoon). I mixed together these ingredients and used a basting brush to to spread over the crust of the pizza. I then placed the crust with sauce in the oven for 5 minutes.

After 5 minutes, I removed the pizza from the oven and added the cheese, pepporoni, Asiago cheese and cooked spinach. The Asiago and spinach were only on one corner of the pizza. See the picture.
I needed to make sure the pepperoni was ok, too.

This is what the pizza looked like after it came out of the oven for 12 minutes!


Now it's time to eat.

Mac n' Cheese

Change on 9/12/10- Gluten Free notes at the bottom of this post.

So, I'm falling into this world of blogging. Perhaps I'm using it as an outlet to write since I don't have that option as much anymore after being out of school. Who knows! Nonetheless, I'm excited about sharing one of my favorite hobbies; cooking!

Henry is enjoying my hobby, needless to say :) If you know him, you know that grin he gets when he's excited about something. Each night I cook something new, I get to see that grin. It's a positive reinforcement for me to keep at it!

I'll post more on things that I've already made in the last few months, but my first post is on something I NEVER thought I'd make again; Macaroni and Cheese. Growing up, I ate this a lot, so it was natural for me to eat it when I went to college! Lucky for me (heavy sarcasm) KRAFT came out with Easy Mac the year I entered college. I can also thank KRAFT for quickly averting me to Mac n' Cheese. When you eat something SO much in such a short time, you don't ever want to see it again!

Well, last night was the first time I had eaten macaroni and cheese since that year. However, this time I made it FOR REAL! Henry and I watched this Mac n' Cheese food challenge on Food Network the other day, and I decided that there is definitely more ways to eat this dish than Kraft's way. I found a recipe on FoodNetwork.com and decided to go after it. http://www.foodnetwork.com/food/recipes/recipe/0,,FOOD_9936_32868,00.html

Ingredients

Kosher salt
Vegetable oil
1 pound elbow macaroni or cavatappi
1 quart milk
8 tablespoons (1 stick) unsalted butter, divided
1/2 cup all-purpose flour
12 ounces Gruyere, grated (4 cups)
8 ounces extra-sharp Cheddar, grated (2 cups)
1/2 teaspoon freshly ground black pepper
1/2 teaspoon ground nutmeg
3/4 pound fresh tomatoes (4 small)
1 1/2 cups fresh white bread crumbs (5 slices, crusts removed)

Directions

Preheat the oven to 375 degrees F.

Drizzle oil into a large pot of boiling salted water. Add the macaroni and cook according to the directions on the package, 6 to 8 minutes. Drain well.

Meanwhile, heat the milk in a small saucepan, but don't boil it. Melt 6 tablespoons of butter in a large (4-quart) pot and add the flour. Cook over low heat for 2 minutes, stirring with a whisk. While whisking, add the hot milk and cook for a minute or two more, until thickened and smooth. Off the heat, add the Gruyere, Cheddar, 1 tablespoon salt, pepper, and nutmeg. Add the cooked macaroni and stir well. Pour into a 3-quart baking dish.

Slice the tomatoes and arrange on top. Melt the remaining 2 tablespoons of butter, combine them with the fresh bread crumbs, and sprinkle on the top. Bake for 30 to 35 minutes, or until the sauce is bubbly and the macaroni is browned on the top.

This is SO good! Henry and I both loved it. The tomato can be a little overwhelming since there is so much dairy in this recipe, but it's not bad. I got to use one of my new Pampered Chef stoneware pieces that I hadn't used yet, so it was great! And, for those that are curious, yes it's taking more than one dishwashing load to clean all the dishes I used...

Make it Gluten-Free!
-Use gluten free pasta.
-Use gluten free all-purpose flour.
-Use gluten-free tortilla crumbs.

LinkWithin

Blog Widget by LinkWithin